
Please ensure Javascript is enabled for purposes of website accessibility

Category: Health and Wellness

  • Try these two exercises to prevent tennis elbow

    Try these two exercises to prevent tennis elbow

    An article published by Medscape reports that 1% to 3% of the U.S. population suffers from tennis elbow annually. These percentages mean that approximately 3 to 10 million people in this country could get tennis elbow this year. If you don’t want to be one of them, there are exercises you can use to prevent tennis elbow. There are two exercises in particular that can be useful for decreasing your likelihood of developing this issue. 

    1. Bend and twist stretch

    Stretching exercises are one tool that can be useful for preventing tennis elbow. An example of a stretch you could add to your daily workout is the twist and bend stretch, and this exercise can help you target the tense forearm muscles that can lead to tennis elbow. 

    The first step you should take for this stretching exercise is to get into the correct starting position. To do this, sit upright in a stable chair with arms and rest your right elbow on the chair arm. From this starting position, bend your elbow upward with your palm facing toward you until your hand is straight up and down. Next, twist your hand to the right as far as you can. You can use your left hand to deepen the twist if desired, but don’t twist so far that it causes pain. Hold the stretch for 10 to 15 seconds and then allow your hand to return to a neutral position. Repeat these steps with your left arm, and you should continue repeating them until you’ve stretched both arms two to three times. 

    1. Tennis ball squeeze

    Another therapeutic exercise that’s designed to prevent tennis elbow uses a very appropriate piece of equipment: a tennis ball. This exercise is called the tennis ball squeeze, and it’s intended to help strengthen the muscles of your forearm. 

    To start the tennis ball squeeze, you’ll need to grab a tennis ball to use during the exercise. Then place your right forearm on the table or counter so you can focus on squeezing the ball, and squeeze the ball as hard as you can for five to 10 seconds. After squeezing for the appropriate length of time, reduce the pressure on the tennis ball slowly until you’re holding it lightly in your hand. Continue to repeat these steps until you’ve done eight to 10 repetitions with your right arm. Then switch over to your left arm and do 10 more repetitions. 

    Visit Peak Performance to learn about exercises and other techniques for preventing tennis elbow

    Preventing tennis elbow is often the most effective way to treat this injury, and we can show use therapeutic exercises to help you. However, these aren’t the only prevention option our team can offer you. We can also offer you a free screening to determine if you have issues that increase your risk of tennis elbow. Our team also combines multiple therapy techniques into personalized treatment and prevention plans that can include: 

    Are you ready to start getting our help with tennis elbow prevention or treatment? Contact us today for more information or to schedule an initial appointment. 

  • Reduce how long a stiff neck lasts with these two stretches

    Reduce how long a stiff neck lasts with these two stretches

    It’s happened to most people. You wake up in the morning, and as soon as your neck moves, you can feel that dreaded stiffness. In many cases, the stiffness should go away on its own within about 24 hours. You might think that you’re stuck with it until it goes away. Fortunately, there are ways you can decrease how long your stiff neck lasts, and there are two stretching exercises for your neck that can be helpful for this. 

    1.   Neck rotation stretch

    One exercise that physical therapists often use for neck stiffness is the neck rotation stretch. The exercise is designed to be easy to do, but it can also be an effective way to stretch stiff and painful neck muscles and reduce how long your stiff neck lasts. 

    You’ll want to sit in a stable chair for this exercise, and the starting position for it is sitting with a straight back and your head centered over your shoulders. From this starting position, slowly turn your head away from the stiff muscles. This means turning your head to the left to stretch stiff muscles in the right side of your neck. Turn your head until you feel a stretch in your neck, and then hold the stretch for 20 to 30 seconds before returning to the starting position. You should repeat these steps three times in total for the best results. 

    2.   Levator scapulae stretch

    The levator scapulae muscle can be a hot spot for neck stiffness. Lifting the shoulder blade is the job of this muscle, and reducing how long stiffness in this neck muscle lasts is best done with the levator scapulae stretch. 

    To begin this therapeutic exercise, sit in a stable chair with good back and head posture. Then place the palm of the hand on the same side as the stiffness on your shoulder. This should leave your elbow pointed up toward the ceiling. Once in this starting position, you’ll place your other hand on the back of your head, and then slowly pull your head down toward your opposite thigh. After 20 to 30 seconds, release the stretch and return to the starting position, and you should continue to repeat these steps until you’ve done the stretch three times. 

    Whatcom Physical Therapy is ready to help you reduce how long your stiff neck lasts

    When you have a stiff neck, the day can feel like it’s dragging on forever. Our team can help you find ways to reduce your neck stiffness more quickly, and it all starts with a free screening. This will give us a chance to learn where your stiffness is, when it happens and other useful information. We can then use this knowledge to create a personalized treatment and prevention plan for you, and therapy methods we may include in this plan are: 

    Contact our team today for more information or to schedule an initial appointment to start treating your neck stiffness. 

  • Two tips to avoid pain on outside of left wrist from golf

    Two tips to avoid pain on outside of left wrist from golf

    For many golfers, the leading arm and wrist are those on the left because you’re right-handed. Many issues can lead to pain in the left or leading wrist. You could be unknowingly using poor swinging form. Playing too much after a long break can also lead to leading wrist pain, and people who don’t stretch or warm up their wrists before playing can be at higher risk of developing wrist pain. However, there are steps you can take to avoid wrist pain. Here are two tips that could help you avoid pain on the outside of your left wrist while golfing: 

    1.   Doing some practice swings before playing

    Warming up your arms, wrists and back is a preventive measure that can help you avoid several types of pain. It can be especially helpful if you’re experiencing pain on the outside of your left wrist while golfing, and a warmup move that can help you avoid this type of pain is weighted practice swings. 

    You should use one of your heavy clubs for this warmup, or you can try using a swing weight. To start your weighted practice, take a normal stance and slowly move through your swing at least 10 times without stopping. Then you can increase your swing speed gradually until you’re moving at full speed. 

    2.   Squeezing a ball

    Another tip that can help prevent golf-related pain on the outside of your left wrist is doing some strengthening exercises. The exercises you do don’t have to be complicated, but they should focus on the strength of the muscles in your hands and forearms. One easy option is to grab a tennis ball or stress ball and give it a good squeeze. Try to hold the squeeze for 10 to 20 seconds each time, and your goal should be to do eight to 10 repetitions per set. 

    Find out how Whatcom Physical Therapy can help treat outside of left wrist pain from golf

    You don’t have to keep getting pain on the outside of your left wrist every time you play golf. Our team can do a free screening for you to help you find ways to treat and prevent this pain. We specialize in building therapy plans that are personalized to each patient’s needs, and our plans are built using the most effective and innovative therapy methods, including: 

    Take the next step to get our help with your wrist pain and other golf-related issues. Contact our team today for more information or to schedule an initial appointment. 

  • Four tips to help prevent golf-related shoulder pain

    Four tips to help prevent golf-related shoulder pain

    Golf is often viewed as a game where there isn’t much activity, but people who have actually played this sport would disagree strongly. There’s a lot of walking involved, and swinging a club uses muscles in your legs, trunk, shoulders and arms. 

    All this movement can lead to many types of pain. One common type of pain people experience during and after a round of golf is shoulder pain. Fortunately, there are steps you can take to prevent this type of pain. 

    Shoulder pain from golf can be prevented using these tips

    The shoulder is a complex structure. Each shoulder has a group of four muscles and tendons known as the rotator cuff, which holds the upper arm bone in the shoulder socket. Your shoulder also contains structures like the labrum, several bursae and the scapula muscles. Any of these structures can be irritated or injured while you’re playing golf, but there are four tips that can help you stop golfing from causing pain in your shoulder:

    1. Don’t carry your golf bag — Golf bags contain golf clubs, tees, balls and various other articles necessary to your game. All of this equipment makes it pretty heavy, though. Carrying a heavy golf bag on your shoulder can easily lead to shoulder pain, but you can avoid this by using a bag cart or golf cart during your games. 
    1. Use proper equipment — Are you using clubs you inherited from someone? Has it been a while since you invested in new clubs? Using golf clubs that aren’t right for you can increase your risk of developing a painful shoulder injury, but getting a set of clubs that are the proper weight and length for you can help reduce the risk of such injuries. 
    1. Use good technique while swinging — Swinging a golf club puts a lot of strain on your shoulders, arms, wrists and back. Players who use poor swing techniques increase this strain, but they can reduce it by improving their technique, which helps reduce the risk of shoulder injuries and pain. 
    1. Stretch and strengthen your shoulders — It’s important to do exercises outside of the course to help improve strength, flexibility and endurance in your shoulder muscles. By making such improvements, you reduce the likelihood of developing golf-related shoulder pain.

    Physical therapy can also help prevent shoulder-based golf injuries

    Physical therapists can perform assessments to reveal factors that increase your risk of a shoulder injury while playing golf. They can then build you an individualized prevention plan to help correct these factors. Using this plan can help you improve shoulder mobility, strengthen shoulder structures and increase shoulder stability. 

    Find out how Excel Sports & Physical Therapy can help you prevent golf-related shoulder pain

    Concerned about your risk of developing shoulder pain from playing golf? Excel Sports & Physical Therapy can help. We’ll assess your shoulder with a free screening. Then, our team will create a personalized prevention plan to fit your needs with therapy techniques, such as: 

    Contact our team today for more information about how we can help you prevent shoulder pain or to schedule an initial appointment. 

  • Three tips to add fun to balance exercises for elderly people

    Three tips to add fun to balance exercises for elderly people

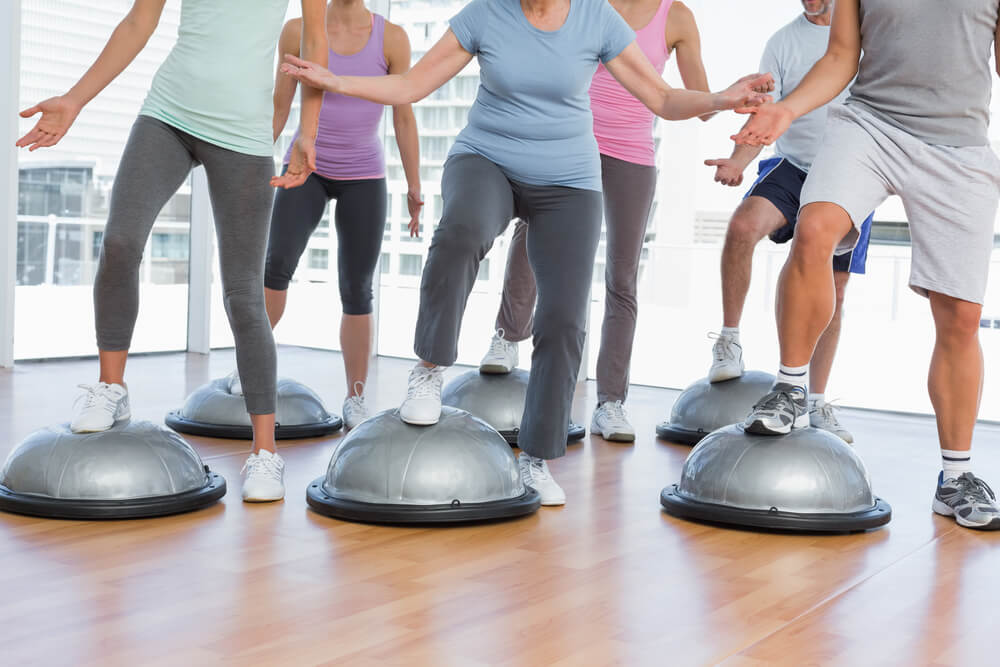
    One issue that no one looks forward to is losing their ability to balance as they grow older. Unfortunately, joints wear out and become arthritic and muscles get weaker as you age, and issues like these can make you feel less stable when walking or standing. However, doing therapeutic balance exercises is a great way to improve your balance and gait. Here are three tips that can help elderly people have more fun while doing their balance exercises:

    1.   Let the music flow

    Many people hear music and their bodies start moving unconsciously. Adding music to a balance exercise routine can help elderly people have more fun while doing their exercises. For one thing, you can choose any type of music you like. Also, music has a tempo and rhythm that can make almost any balance exercise more fun, especially if you try to do the exercise to the beat of the music. 

    2.   Bring in some fun objects

    Another way elderly people can add some fun to their daily balance exercises is to add some objects to the mix. An example would be to try adding a bean bag to a balance exercise. You can try placing a bean bag on your shoulder or the top of your head while doing the tightrope walk exercise, or you could try to balance one on your foot while you do step-ups. 

    Another fun object you can try adding to your balance exercises is a ball. For instance, dribbling a basketball could add fun and a bit of difficulty to walking exercises like the zig-zag walk. 

    3.   Work with a partner or group

    Doing your balance exercises with a partner or group is another way seniors can add fun to this daily task. After all, the side step exercise is a lot like dancing if you do it with a partner, and it’s even more so if you add some music too. You’ll also have someone to laugh with when silly things happen with the bean bags or balls as you do your exercises. Other seniors might also be able to show you balance exercises that you haven’t tried. Such exercises can make your daily routine more fun and challenging, and you’ll get the chance to form a closer connection to someone with similar balance issues. 

    Visit SSOR to find more fun balance exercise options and tips for elderly people

    We can do so much more than show elderly patients a few fun balance exercises. Our team can perform a complimentary screening that’s designed to pinpoint specific joint and muscle issues affecting your balance. Our SSOR physical therapy specialists can also build you a personalized therapy plan. We’ll use multiple therapy techniques in your plan, which may include: 

    Contact us today for more information about balance and gait disorders or to schedule an initial appointment. 
  • Worried about lower back pain? Here are three tips that help prevent it

    Worried about lower back pain? Here are three tips that help prevent it

    Your lower back (also known as the lumbar spine or region) is one of the most common areas where people develop back pain. At any given time, a large number of American adults are dealing with lower back pain. 

    Lower back pain is typically a symptom of a deeper issue. Sports injuries or improperly lifting heavy objects are issues that can cause lumbar pain. There are many other factors that can increase your risk of lumbar pain as well. However, there are also tips you can use to help prevent lower back pain. 

    Three tips you can use to help prevent lower back pain

    Your back is a complex structure made up of vertebrae, muscles, nerves and more. The large number of structures in your back also means that it’s much more vulnerable to injury. These three tips offer helpful advice on how to prevent lower back pain: 

    1. Strengthen your core — The core muscles include the back muscles, abs, diaphragm, obliques and others. Inactivity often leads to weakness in the core muscles, which decreases their support for your lower back. However, you can increase their ability to provide back support by doing exercises like planks and bridges to strengthen them. 
    1. Pay attention to how and how long you sit — One factor that commonly leads to lower back pain is poor posture while sitting. Many people slump forward to look down at their computer screen or cell phone for hours at a time. The longer you sit, the more likely this posture is to cause back pain. Straightening up when you sit and getting up to move around more often can help reduce the ill effects of poor sitting posture. 
    1. Eat a varied, healthy diet — All the structures in your back need vitamins, minerals, proteins and other nutrients to help them stay strong and healthy. Eating the same kinds of food constantly can reduce the types of nutrients your body is getting. Also, eating lots of processed or carb-heavy meals can lead to obesity and inflammation, which can increase your risk of lower back pain.One tip to help prevent lower back pain is to eat a more varied diet that puts more emphasis on fruits and veggies. Doing so will help you get a wider array of vitamins and minerals and antioxidants that help fight inflammation. 

    Visit Excel Sports & Physical Therapy to find more help preventing lower back pain

    Do you think you’re at risk of developing lower back pain? Our physical therapy team at Excel Sports & Physical Therapy can help you find ways to prevent it. We offer free screenings that can pinpoint issues that cause this type of pain. Our team can also build you a personalized treatment and prevention plan, which might include beneficial therapy methods like: 

    Take the next step to start preventing pain in your lower back. Contact our team today for more information or to schedule an initial appointment. 

  • Make the most of your health care plan this holiday season

    Make the most of your health care plan this holiday season

    The holiday season is just around the corner, which means it’s time for good cheer and great food with friends and family. It also means that your time to spend the remaining funds in your flexible spending account (FSA) is nearing its end.

    Not familiar with your FSA? It’s an account that many employers contribute tax-free funds into from your paycheck. This is a benefit that many employers offer, so you should double-check with yours to see if they’ve been contributing to an FSA on your behalf. If so, you may have some money to spend on health care.

    What exactly is my FSA?

    The purpose of the FSA is to help you save up funds to help pay for out-of-pocket medical expenses. This may include deductibles, copayments, medicine and even medical braces or other assistive devices.

    The current maximum for an FSA account is $2,700 per year. If your employer has contributed up to this full amount and you haven’t used all or any of it, you may be at risk of losing it. At the end of the year, FSA funds deplete. Many employers offer flexibility options: either a 90-day grace period to extend the amount of time you have to spend your FSA funds or they can let you keep $500 of your remaining funds and roll it into next year.

    Employers can only offer one of these options and have no obligation to offer either.

    What do I do with my FSA?

    The end of the year is near. If you still have funds in your FSA, now is the time to spend them before they deplete. So, what should you do?

    FSA funds can only be spent on goods and services related to health care needs. Your top priority may be to schedule checkups or any other appointments you’ve been putting off. We recommend scheduling an appointment with a physical therapist.

    Physical therapists are licensed health care professionals whose services qualify for FSA spending. At Excel Sports & Physical Therapy, our team can examine your physical condition and determine if you need any treatment. We can help reduce pain from chronic conditions like arthritis or muscle tension and we can help you recover from injuries.

    Physical therapists also help you improve and maintain your physical condition. This helps you stay fit enough to get through daily activities and enjoy time with friends and family.

    Come visit Excel Sports & Physical Therapy for an examination and treatment

    Now that the end of the year is so close, you should be asking yourself if you’ve met or come close to meeting your deductible. If not, and you have an FSA, you may have some additional funds available for use until the year is finished.

    Don’t put off care any longer. Our team is available to perform an examination and help you receive the physical therapy you may need. Contact us today for more information about making the most of your FSA or to schedule an initial appointment.

  • Fun balance exercises for elderly physical therapy patients

    Fun balance exercises for elderly physical therapy patients

    As we get older, our risk of injury due to falling increases. One of the biggest causes for this is a decline in our balance due to reasons such as reduced muscular strength and range of motion and a general lack of physical activity. An increased sedentary lifestyle can actually create a vicious cycle where declining faculties make us less likely to be active and lack of activity leads to a sped-up process of degeneration. 

    Balance exercises can provide significant benefits in terms of stability and functioning to help counteract these forces. By making them fun, elderly patients in need of motivation are able to find the motivation they need to make staying active a regular part of their lives. This is why we’re happy to share this informative overview of how physical therapists are able to make balance training engaging and even entertaining. 

    Physical therapy balance training and exercises for seniors

    Older patients seek balance training from physical therapists for a range of reasons, including post-operative rehabilitation, injury recovery prevention and long-term management of conditions like arthritis and vertigo. When meeting with a physical therapist initially, one of the first steps is an evaluation that will include movement and balance testing to establish a baseline. 

    Using this information, you and your therapist can work together to develop a balance training program designed to accomplish the following goals: 

    • Improve coordination between the eyes and body
    • Strengthen important stabilizing muscles
    • Increase range of motion through gentle stretches
    • Promote stability through repetition of certain movements

    Making balances exercises into a fun activity can sometimes be elusive — and the relationship between you and your therapist plays a big role. That’s why finding a clinic that values patient-centric care is so important. 

    SOL Physical Therapy loves making balance exercises fun for the elderly — and all patients

    At SOL Physical Therapy, our mission is to understand your needs and treatment goals to develop an effective therapy program that helps you get back to the healthy and active lifestyle you deserve. Our team are firm believers that patients who are having fun and enjoying their experience will be more likely to commit to balance and stability training on a long-term basis. 

    Start your journey to wellness by contacting us today. We’ll be happy to help you schedule your initial appointment with a member of our talented team.

  • Two women’s physical therapy exercises used in Kalamazoo, MI

    Women’s physical therapy can be used to treat many issues in Kalamazoo, Michigan. One common issue it’s used to treat is pelvic floor dysfunction, and this condition can be caused by weak pelvic floor muscles. Physical therapists can help you learn many therapeutic exercises to strengthen the muscles of the pelvic floor. Here are two examples of exercises a women’s physical therapist can recommend to strengthen these muscles: 

    1. Hip bridge raises

    Hip bridge raises are a low-impact exercise you can perform lying on the ground. The exercise primarily targets the glutes, but it has an impact on your pelvic floor as well.

    To do hip bridge raises, lie on the flat of your back on the floor. Bend your knees at a 90-degree angle, keeping your feet flat on the ground and your arms pressed flat against your sides with your palms on the ground.

    Take a deep breath and push your hips up off the ground. Focus on driving the weight through your heels and squeezing the glutes and pelvic muscles while driving your hips upward. When you’ve reached a point where your body forms a straight line from the knees to your shoulders, slowly lower back down to the ground. Repeat this 10 to 15 times for two to three sets every other day of the week.

    1. Shallow squats

    The squat is an exercise that many people associate with strengthening the legs and buttocks. While they do work the muscles in these areas, squats can also work the pelvic floor muscles. A squat variation called the shallow squat is often used in women’s physical therapy plans to increase the strength of the pelvic floor muscles. 

    To do a shallow squat, you’ll first need to position your body correctly. The correct starting position for this exercise involves standing with your feet about hip width apart, and your feet should also be flat on the floor. From this starting position, slowly bend your knees until they reach about a 45-degree angle. Be sure to keep your back straight and bend forward slightly as you bend the knees, and concentrate on tightening your pelvic floor and buttocks as you slowly return to the starting position. Repeat these steps until you’ve done about 10 reps. You can do more sets of shallow squats, but you’ll want to rest for 30 seconds to a minute between each set. 

    Armor Physical Therapy in Kalamazoo, MI, offers women’s physical therapy

    If you have pelvic floor dysfunction in Kalamazoo, Armor Physical Therapy has a clinic in your area that offers women’s physical therapy. We can begin your treatment process with a free screening, and this step can help us pinpoint the cause of your condition. Using this information, our team can then create an individualized therapy plan for you, and some treatments that could be included in your plan are: 

    Are you ready to get our help with your pelvic floor dysfunction? Contact us today for more information or to schedule an initial appointment. 

  • Best sitting position for lower back pain: Three useful tips

    Best sitting position for lower back pain: Three useful tips

    Many people in Blaine, Washington, could be suffering from lower back pain, and this isn’t very surprising. The National Institutes of Health reports that 80% of adults will likely deal with lower back pain at some point in their lives. There are many factors that could be causing or even increasing your pain. One of these factors is the way you sit, and there are three tips that you can use to make sure you’re in the best sitting position for lower back pain.

    1.   Have lumbar support

    One tip that can help you sit in the best position for lower back pain is to make sure you have good lumbar support. If you’ve seen an ergonomic chair, the curve in the chair at lower back level is the lumbar support. Even if you don’t have an ergonomic chair to sit in at work, you can still make sure your lower back is supported. One option you can try is to place a rolled-up towel in the curve of your back. Another potential fix for this issue is to buy a special lumbar support cushion, or you could simply upgrade your office chair to a model that has built-in lumbar support.

    2.   Keep knees and hips properly positioned

    Keeping your knees and hips properly positioned is another way to ensure you’re in the best sitting position for lower back pain. Yet you might not know what the correct position for your knees and hips is. For most people, the proper position for these body parts is to have them both at a 90-degree angle. This way they can provide the greatest support for your lower back.

    3.   Pay attention to how you hold your feet

    Keeping in the best sitting position for lower back pain will also involve paying attention to the position of your feet. Many people sit with their ankles crossed, and this means only the sides of the feet are touching the floor. Other people like to sit with their feet leaned up against the wall or desk rail, which only leaves the heels on the floor. The problem with both of these positions is that they mean your feet are providing less support for the lower back. This is why the best position for your feet when you’re sitting is flat on the floor.

    Whatcom Physical Therapy in Blaine, WA offers treatment options for lower back pain

    If sitting in the wrong position has caused you to have lower back pain, you won’t have to go far to get help. Whatcom Physical Therapy has a clinic in Blaine where you can find help for your lower back pain. We offer free screenings that can help reveal the source of your pain. Our team has lots of experience building personalized back pain treatment plans, and we typically use multiple beneficial therapy techniques in these plans, such as:

    Don’t wait any longer to start getting our help for your lower back pain. Contact our team today for more information or to schedule an initial appointment.

  • Three exercises to avoid when suffering from tennis elbow

    Three exercises to avoid when suffering from tennis elbow

    The elbow is a joint that people use to make lifting movements with the arm, and it also plays a role in twisting the forearm and hand. These movements become much harder and more painful when you have tennis elbow. Also called lateral epicondylitis, this condition occurs when the tendons in the outside of your elbow become inflamed, and the injury is typically caused by repetitively moving the elbow. There are some exercises that can help speed up the healing of lateral epicondylitis. However, there are three exercises you should avoid if you have tennis elbow.

    1.   Pushups

    Pushups are a very popular body-weight exercise. However, this exercise is one that you should definitely avoid if you have tennis elbow. Pushups are designed to work your triceps, pectorals and shoulders, but you will have to bend your elbows repeatedly to do them. This means that you’ll be increasing the strain on already injured elbow tendons.

    2.   Chin-ups

    Another common exercise people should avoid when recovering from tennis elbow is chin-ups. This exercise typically involves pulling your body weight up using your arm, shoulder and back muscles, and many people consider this exercise to be an excellent addition to a workout. However, it does place a lot of stress on the elbow tendons, which is one reason it’s a no-go if you have tennis elbow. It also involves repetitive elbow movements, which is another strike against the chin-up.

    3.   Dumbbell wrist curls

    Difficult body-weight exercises like chin-ups and pushups aren’t the only ones tennis elbow sufferers should avoid. There are even some seemingly easy exercises that you may want to shy away from until you heal. An example of such an exercise is the dumbbell wrist curl. The main reason to avoid this exercise is that it’s specifically designed to work the muscles of the forearm, and these are the exact muscles that are attached to your injured elbow tendons.

    Find out about exercises beneficial to tennis elbow at Whatcom Physical Therapy

    It’s true that some exercises should be avoided if you have tennis elbow. However, Whatcom Physical Therapy can show you therapeutic exercises that can help you heal more quickly. Such exercises are likely to be a part of the personalized treatment plan we create for you, and this treatment plan may also include other beneficial therapy methods such as:

    Take the next step to start getting our help for your elbow injury. Contact our team today for more information or to schedule an initial appointment.

  • Four types of exercises you should avoid when you have hip arthritis

    Four types of exercises you should avoid when you have hip arthritis

    Hip arthritis causes pain and stiffness that limits your ability to enjoy many physical activities. Many people with hip arthritis exercise on their own or under the guidance of a physical therapist to help reduce arthritic pain and improve their mobility.

    It’s great if you’re thinking about taking up exercising to improve your hip condition when you have arthritis. However, there are some exercises that can make your hip pain worse. Take a look below to discover which exercises you should avoid if you don’t want to make your hip arthritis worse. 

    1. Exercises that require a lot of bending at the hips

    Many exercises for hip pain will involve some amount of bending at the hips, but some exercises put too much strain on your hips. You should avoid any exercise that causes further strain and pain when bending at the hips.

    Try exercises that require more bending at the knees rather than the hips. These tend to help take some strain off the hips while strengthening the muscles connected to them. 

    2. Exercises on uneven terrain

    Exercising on uneven terrain like stairs or when hiking outdoors puts additional strain on your hips. This can cause your pain and stiffness to grow worse. These exercises also increase your risk for falling, which can result in a serious injury.

    Instead, focus on stationary exercises that you can perform while standing, sitting or lying in one place. 

    3. High-impact exercises

    One of the most common ways people stay active is to run. However, when you have hip arthritis, running can be painful. Running is a high-impact exercise that sends shock all the way up your legs and into your hips and lower back.

    Instead of running, try swimming or bicycling to stay fit and reduce the impact on your hips. 

    4. Weightlifting exercises

    Exercises that involve lifting heavy weights with your legs increase strain on the hips. Avoid these exercises and focus on exercises that just use your body weight instead. If you make enough progress, your physical therapist may recommend some light weights or other exercises with increased resistance to meet your needs. 

    Visit Panther Physical Therapy for hip arthritis treatment

    Are you looking to reduce pain and stiffness caused by arthritis in your hips with natural treatments like physical therapy? Our physical therapists at Panther Physical Therapy are highly trained and skilled in identifying which exercises can be most beneficial for you. Contact our team today for more information about treating hip arthritis or to schedule an initial appointment. 

When Was Your Appointment?

We recently changed bill pay providers. Please click the button for the date of your appointment to be directed to the correct online payment portal.